It Starts With Understanding the Brief, Not the Blueprint
Most people assume the model-building process begins the moment a drawing lands on a workshop table. In practice, the more important conversation happens before that — understanding why the model is being built at all. A model meant to sit in a sales office for a year needs different construction choices than one built for a single exhibition weekend, and a good workshop will ask about this before touching any material.
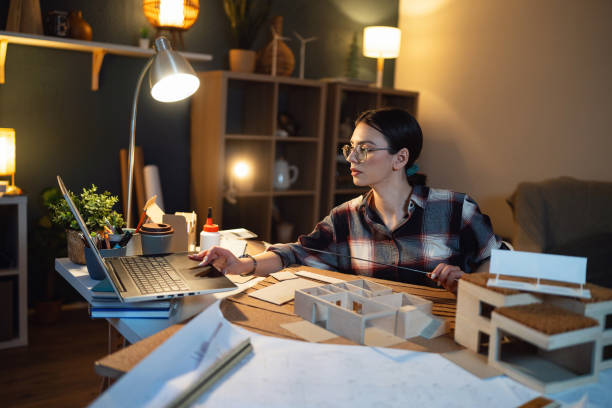
Once the purpose is clear, the technical drawings come into play — floor plans, elevations, site plans, whatever documentation exists for the project. A skilled model making company india will flag inconsistencies in these drawings early, things an architect or engineer might not have noticed because they’re used to viewing the project on screen rather than as a physical object that needs every dimension to actually add up in three dimensions.
This early stage is also where scale gets decided, and it’s not always as simple as picking a round number. A large township might need 1:500 for an overview and a separate 1:200 model of a specific building cluster for detail. A single villa might warrant 1:50 to show interior layouts properly. The right scale depends on what the viewer needs to understand at a glance versus what they’ll want to examine closely.
Building the Base Before Anything Else
With scale and materials settled, work usually starts with the base structure — the platform, topography, and core building forms before any fine detailing begins. This stage is deceptively important. A base that isn’t perfectly level or a structure that isn’t dimensionally accurate will cause problems at every later stage, no matter how much detailing gets layered on top.
For architectural and township projects, this often includes contouring the landscape if the site has elevation changes, laying out roads and plot boundaries, and getting the massing of buildings correct before windows, textures, or paint go anywhere near the piece. Skipping ahead to detailing before the base is solid is one of the more common mistakes that separates rushed work from a properly built model.
Clients are usually shown progress at this stage, partly because it’s the easiest point to catch a layout issue before too much time has been invested in finishing work. A good studio treats this as a checkpoint rather than a formality, and welcomes feedback here even if it means adjusting the plan slightly before moving forward.
Detailing, Finishing, and the Parts People Actually Notice
Detailing is where a model starts to feel real — landscaping, window frames, signage, vehicles, human figures for scale reference, and interior furnishing if the model calls for it. This stage takes the longest and is where craftsmanship becomes obvious. Two models built to the same specifications can look dramatically different depending on how much care goes into this phase.
Lighting, when included, is typically wired during this stage as well, with LEDs placed to highlight architectural features or interior spaces without cables being visible from the viewing angles that matter. Painting and finishing touches follow, along with a final quality check that most reputable studios build into their process — checking for glue marks, uneven paint, loose elements, or anything that wouldn’t survive being shipped or handled repeatedly.
Packaging deserves more attention than it usually gets in conversations about this process. A beautifully built model that arrives cracked because it was packed in an ordinary box reflects just as poorly on the workshop as a shoddy build would. Established studios build custom transport crates for larger or more delicate models, which is a detail worth asking about if your model needs to travel any real distance.
Setting Realistic Expectations From the Start
A straightforward model can sometimes be turned around in two to three weeks, but anything with real complexity — a large township, a detailed industrial plant, or a model with interior lighting and moving elements — often needs six to eight weeks or more. Rushing this kind of timeline usually shows in the finished product, and it’s worth building in buffer time for revisions rather than planning around the absolute fastest possible delivery.
Cost, similarly, tracks closely with detail level and scale rather than just the physical size of the model. A small, highly detailed piece can cost more than a larger but simpler one, which surprises clients who assume price scales purely with dimensions. A transparent model making company india will walk through this pricing logic rather than just handing over a number, so you understand what you’re actually paying for.
If you’re commissioning a model for the first time, going in with a clear sense of purpose, a realistic timeline, and openness to the studio’s material and scale recommendations tends to produce a far better result than treating it as a simple transaction. The workshops that do this work well are, at their core, translating a technical drawing into something people can understand at a glance — and that’s worth giving proper time and attention.
Treating the Process as a Partnership
One theme that comes up repeatedly across successful projects is that the best results happen when the client stays engaged throughout the build rather than disappearing after the initial brief and only reappearing at delivery. Reviewing progress photos, answering questions promptly, and giving clear feedback at each checkpoint keeps small issues small instead of letting them compound into a finished piece that misses the mark.
This collaborative approach is exactly what a good model making company india tends to encourage from the outset, since they know a model built in a vacuum, without client input along the way, rarely turns out as well as one shaped by ongoing dialogue between the workshop and the people who understand the project best.
Budgeting for the Full Scope, Not Just the Model
It’s worth remembering that the model itself is rarely the only cost involved in this process. Shipping, custom display cases, protective packaging, and eventual repairs or touch-ups after months of handling all add up, and a realistic budget should account for these rather than being based purely on the initial build quote.
Clients who plan for this fuller scope from the start tend to have a smoother experience overall, since they’re not caught off guard by additional costs that a good workshop will usually flag early anyway, precisely because they’ve seen how often these secondary expenses get overlooked in initial planning conversations.